
Typically being more reliant on Flash memory than having plenty of RAM and a hard disk – and in some cases also being ‘headless’, i.e. having no HDMI or video output – the distribution for embedded applications is tailored to available resources, rather than not being capable of running certain functions or commands. For the headless SBCs the only way to interact with them is through the Linux command line, so a good grounding in the basics of Linux is essential. Also, at a device and peripheral connectivity level, such as with GPIO interfaces and I2C functions, there are a number of Linux resources that are important to know. In this article we’ll cover some of the commands you are most likely to use when connecting up your embedded SBC to the real world. It is assumed that you have some basic Linux command line skills.
Before getting to work with the command line interface (CLI), let’s review some of the benefits of using Linux. Found running on anything from compact SBCs with embedded microcontrollers through to multi-core data-centre servers, Linux is an extremely efficient and scalable operating system (OS). As we’ll find out in this article, there are a large number of open-source programs that can be used on your SBC. We’ll cover some of these in this article, but there are hundreds more. One aspect of using an OS for an embedded design is that it is doesn’t particularly suit the latency and deterministic requirements of some real-time applications. That said, there are a number of industry developments that aim to provide a pre-emptive-based hard real-time Linux OS. Essentially, this permits the OS to be interrupted as required in order to service real-time requirements. Also, since Linux is an open-source OS it is licensed under the GNU General Public License (GPL) and is free to use and modify. In that context, the amount of community support for the OS is vast, since there are thousands of developers involved in Linux kernel and application development.
Command level interface
For the examples in this article we’ll use the PocketBeagle board. The PocketBeagle has an IP address of 192.168.6.2 and the default user is ‘debian’. Throughout this article <ret> means pressing the return or enter key. Holding down the Control key and pressing another key, in this example ‘D’, is signified by Ctrl-D. Linux commands also have a long list of options that can be invoked from the command line. Readers are encouraged to research these, a list of which can be found by simply typing the command followed by - - help, for example, df - - help<ret> yields full details of the command syntax and options, in this case on the device file system command.
Making the connection from your computer to the PocketBeagle is down to using a terminal program such as PuTTY for running under Microsoft Windows, or Terminal when using Mac OS X.
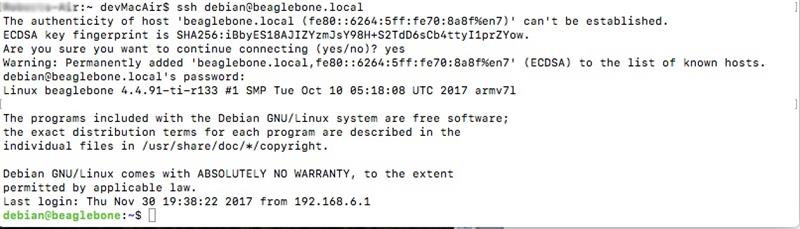
Figure 1: The process of attaching to the board via SSH using Apple’s Terminal utility.
SSH (Secure SHell) provides a secure encrypted method of remotely connecting to another computer. Once connected you can run any command that you would be able to if directly working on that computer.
The most frequently used command format is SSH user@host<ret>. The host can be either an IP address or, in the example of Figure 1, the host name on a local network. An SSH session can be terminated using Ctrl-D. If the host, in this case the PocketBeagle, has not been communicated with previously, a warning message will be displayed as indicated in Figure 1. On accepting this, the host and its corresponding RSA key will be stored in the localhost file.
Linux is based around the premise that everything is a file, and GPIO pins are no exception to this approach. Each one of the PocketBeagle’s available inputs and outputs are treated in this way and can be found in the /sys/class/gpio directory. When you are working in a language such as Python, you can set each individual GPIO as input or output, in addition to setting it high or low if it is an output. This can be achieved in the same way at the command line. See Figure 2.
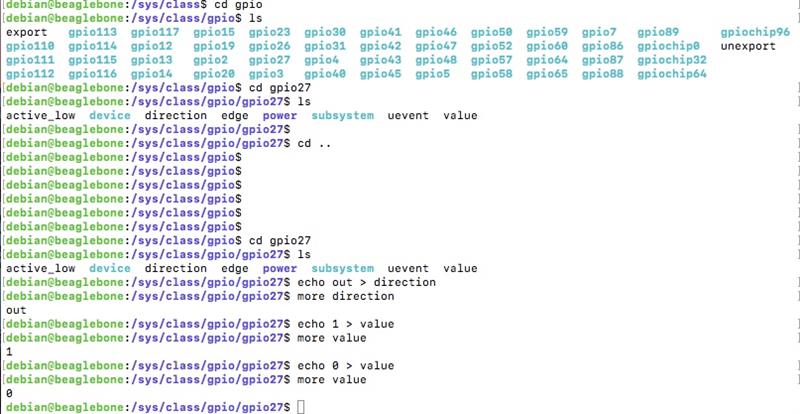
Figure 2: Controlling GPIO from the command line.
In this example, having selected pin gpio27, we set the GPIO direction with the command echo out > direction<ret>. This puts the ‘out’ into the file ‘direction’. You can then set the output value of the pin by the commands echo 1 > value<ret> to drive the pin high or echo 0 > value<ret> to drive the pin low. With the PocketBeagle you can have some fun by turning the USR LEDs on and off in the same way, changing the ‘brightness’ value from 0 to 1 to turn the LED on. See Figure 3, which shows this for the USR3 LED.
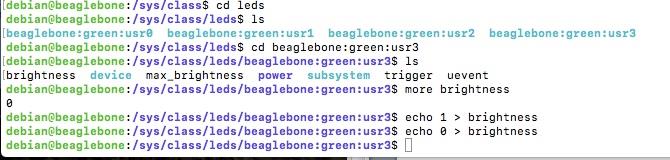
Figure 3: Turning on/off the USR3 LED on the PocketBeagle.
When it comes to attaching an I2C device such as a seven-segment display or an accelerometer to an embedded board’s I2C bus, it is vital to ensure no other device is already using an address on the bus. Often an SBC is equipped with more than one I2C bus. Typically some internal board peripherals may be connected to one, while another one or two may be available for user applications. The i2cdetect utility can scan a specified bus and return the results of devices found. The - l option provides information on the number of I2C buses available, while the i2cdetect –r 0<ret> command gives a listing of devices discovered on bus 0. In the example shown in Figure 4, two devices have been found at addresses 24h and 50h.
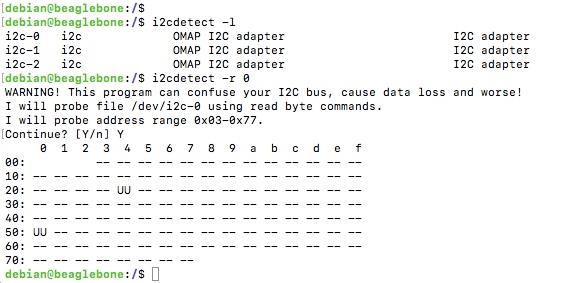
Figure 4: Using ic2detect on the PocketBeagle.
Adopting an SBC that supports the use of Linux adds a lot of functionality and helps ease the development process through the use of open-source tools and software. Embedded developers will appreciate the ease with which utility commands make the task of integrating peripherals and implementing data connectivity across a local network and out to web-based applications.
Some frequently used file and directory commands
ls – list files
examples, ls <ret>, ls –l<ret> display full details for each file
cd – change directory
examples, cd<ret>, cd ..<ret> move up a directory, cd /.<ret> move to root directory, cd ~/<ret> move to home directory, cd /node_modules<ret>
mkdir – make a new directory
example, mkdir projectfab<ret>
rm – delete a file
example, rm empty.txt<ret>
rmdir – delete a directory
example, rmdir projectfab<ret>
cp – copy a file or directory
example, cp program.c projectfab/program.c<ret> copy the file program.c into the sub-directory projectfab
mv – move a file or directory
example, mv program.c projectfab/newprogram.c<ret> move the file program.c into the sub-directory projectfab and rename it newprogram.c
touch – create an empty file
example, touch empty.txt<ret>
more – view the contents of a file
example, more program.c<ret>
whereis – find out where a particular file or directory is stored
Other useful utility commands
df – provides details on the computer’s file system and mounted devices
du – a complete directory of files
You can ‘pipe’ the output of one command to another – for example, to display a screen full of the above command’s output at a time use
df | more<ret>


